Drilling:
It is use of regular drilling procedures. For Steel, Magnesium and plastics the alternative larger size drills recommended in the second column should be used.


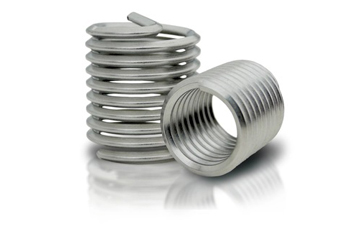
Thread insert, typically made from brass or stainless steel are used in the assembly of many consumer products, automobiles and electronics. Also known as threaded bushing, a fastener element which is inserted into an object to append a threaded hole, it even works as a repair in a stripped threaded hole.
We at Khodiyar Springs are a step ahead to fabricate well equipped thread insert, a testimony to our excellent fabrication, commitment and service to customer.
Thread insert provide permanent, high-quality, wear-resistant internal threads mainly designed to get installed in drilled holes or molded forms in a simple and quick way. In-fact there are many advantages of using thread inserts.
Our thread insert are firmly locked and resist vibrations without loosening. It is also proven many times during tests conducted in government agencies, independent laboratories and commercial uses.
These standard and high quality threads can be installed quickly into molded or simple drilled holes. These threads help create well-built and long-lasting assemblies.
Thread insert minimizes the loss of clamping pressure due to cold flow of base material. These are created to disperse clamping forces to soft materials. It functions as a metal bushing between the fastener and components that come in contact with each other.
Khodiyar springs, mostly covers all the possible varieties of installation process and are selected widely by original equipment manufacturers for all kinds of volumes of production.
Khodiyar spring thread insert come in diverse range of sizes and diameter and are utilized in innumerable industries including electrical engineering, plant engineering, aerospace industry, defence industry, medical industry, telecommunications, automotive industry and at many other places.
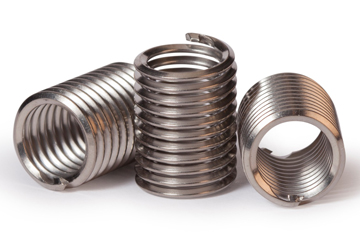
Standard, general purpose material. Stocked in most sizes.
Ideal for original equipment applications, repair and overhaul
Material Spec : AS7245
Temprature range : up to 800℉br>
Tensile : 200,000 250,000 PSI
Hardness : RHc 43-50
Corrosion resistance : Moderate
Magnetic Permeability : 2-10 G/o (depending on wire size)
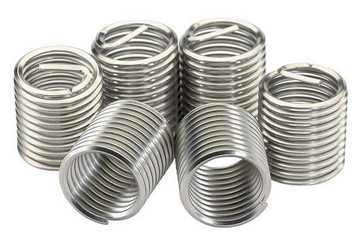
Used in areas exposed to high temperatures.
Typical uses : gas turbine, engines, nuclear applications, well drilling.
Non - Magnetic.
Material Spec : AS7246
Temprature range : up to 1,000℉br>
Tensile : 200,000 PSI
Hardness : RHc 43-50
Corrosion resistance : High
Magnetic Permeability : <1 G/o
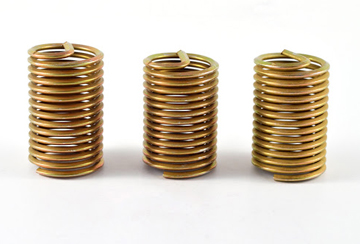
Standard, general purpose material. Stocked in most sizes.
Ideal for original equipment applications, repair and overhaul
Material Spec : AS7245
Temprature range : up to 800℉br>
Tensile : 200,000 250,000 PSI
Hardness : RHc 43-50
Corrosion resistance : Moderate
Magnetic Permeability : 2-10 G/o (depending on wire size)
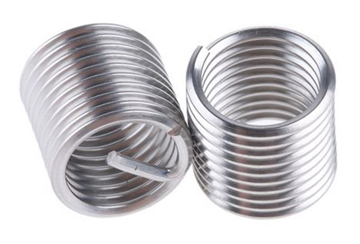
Superb gall resistance.
Compatible with stainless steel Screws
ldeal for use in vacuum environments.
Requires no additional coatings or plating.
Particle free
Non-magnetic
Material Spec : UNS S21800
Temprature range : up to 500℉
Tensile : 200,000 PSI
Hardness : RHc 43-50
Corrosion resistance : Moderate
Magnetic Permeability : <1 G/o
Superior strength-to-weight ratio
Corrosion resistant.
Excellent low temperature stability.
Material Spec : AMS 4957 & AMS 4958A
Temprature range : up to 600℉
Tensile : 150,000 to 220,000 PSI
Hardness : RHc 35-43
Corrosion resistance : High
Magnetic Permeability : non-magnetic
Khodiyar spring thread inserts enhance performance and quality both. They are quite sturdy and aids in improving distribution of residual stress, enhances load bearing capacity and are designed in a way to utilize shorter and smaller threads especially for low strength alloys. Also for exercises involving maximum and upraised corrosive conditions or subject to the consequences of galvanic corrosion, surface coating in addition are available in Cadmium, aluminum, zinc and others for maximum resistance.
It is use of regular drilling procedures. For Steel, Magnesium and plastics the alternative larger size drills recommended in the second column should be used.
Tapping is usually done in a single operation with one of the types of finishing taps. Roughing taps are available, however, for occasions when materials make both rough and finish cuts necessary.
It’s use requires thread gauge to check size and full thread depth in conventional manner.
Inserting tools are available for hand installation of inserts. The Pre-winder type is a precision tool which aligns and recompresses the insert for easy installation. A slotted mandrel in the tool drives the insert by its tang. This tool is recommended for hand installation of all sizes of Coarse ∓ Fine series of inserts.
The tang on an insert should be removed after installation only when necessary, for screw clearance or product appearance, and in such case notched inserts should be used. This is easily accomplished by placing the punch of the Tang Break off tool into the installed insert and resting tool squarely on the insert tang. Strike the top of the tool with a hammer, using a sharp blow.
In rare instances, inserts are installed, too deep cross-threaded or otherwise improperly inserted. Such inserts are readily removed with extracting tools which are available in four sizes to fit all sizes of inserts. Place the blade of the extracting tool into the insert. Hit the top of the tool with a hammer, causing the blade to bite into the insert. Push down on the tool and rotate counter clockwise to back the insert out of the hole (inserts produce permanent threads; hence extraction is not normally necessary)
Thread Insert are available in a wide choice of materials to suit specific application needs like 304 stainless steel standard, general purpose material and many more. They are stocked in most sizes and ideal for original equipment applications, repair and overhaul.